Tile Roof Underlayment | Types & Cost

You might not think much about what’s under your tile roof, but that hidden layer does a lot of heavy lifting. When it starts to wear out, leaks, mold, and costly repairs aren’t far behind. Whether you’re replacing a roof or just trying to get ahead of future issues, it helps to know your options. We’ll break down everything you need to know about tile roof underlayment: types, costs, lifespans, and more. Key Notes Underlayment is tile roofs’ second defense line, redirecting water that gets past tiles. Four types range from basic felt ($0.15-0.55/sq ft) to premium rubberized asphalt ($1.00-3.00+/sq ft). Climate determines best choice: synthetic for hot/wet areas, rubberized for cold/storms, felt for mild. Underlayment lasts 20-35 years versus 50+ for tiles, requiring replacement during roof lifetime. What Is Tile Roof Underlayment (& Why It Matters) Underlayment is the hidden MVP of your roof’s defense system. It’s installed directly onto the roof deck – usually plywood or oriented strand board (OSB) – before the tiles go on. Tile roofs aren’t 100% waterproof. They shed most water, but wind-driven rain, ice, or cracked tiles can still let moisture in. That’s where underlayment steps in. It redirects any water that gets past the tiles, channeling it safely to your gutters and away from your home. It also protects against mold, mildew, rot, and premature roof damage. How Does Tile Roof Underlayment Work? Underlayment acts as a second line of defense beneath your tile roof. It: Tile is heavier than most roofing materials, which means the underlayment must be strong, tear-resistant, and durable. Compared to asphalt shingles (which rely more on overlapping for water protection), tile systems lean heavily on underlayment to prevent water intrusion. Types of Tile Roof Underlayment Each underlayment type offers its own balance of cost, durability, waterproofing, and climate suitability: Underlayment Type Lifespan Waterproofing Best For Avg. Cost/sq ft Asphalt Felt 20–30 years Basic Mild climates, tight budgets $0.15 – $0.55 Synthetic 20–35 years High Hot, wet, or windy regions $0.50 – $2.00 Rubberized Asphalt 25–35+ years Excellent Storm-heavy or icy regions $1.00 – $3.00+ Breathable Membranes 20–35 years Moderate Hot & humid climates $1.00 – $2.50 Asphalt-Saturated Felt Synthetic Underlayment Rubberized Asphalt (Self-Adhering Membranes) Breathable (Vapor-Permeable) Underlayments Climate-Specific Recommendations Different climates = different underlayment demands. Hot & Sunny Climates Go with UV-resistant synthetic or breathable membranes. These resist sun damage and allow moisture vapor to escape, helping your roof breathe in extreme heat. Cold & Snowy Climates Use rubberized asphalt or ice & water shield at valleys and eaves. These self-seal around fasteners to prevent leaks from freeze-thaw cycles or snow buildup. Wet or Stormy Climates Opt for self-adhering rubberized membranes for full waterproofing. They cling tight to the deck and block wind-driven rain. Mild Climates You can get by with asphalt-saturated felt or standard synthetic. Just be sure it’s installed right. Cost of Tile Roof Underlayment Here’s a general breakdown of underlayment material costs: But materials are just one part of the picture. The big cost driver is labor. Tile roofs require removing and reinstalling heavy tiles, which means more hours on the job. Labor often adds $2.75 – $3.50 per square foot on top of material costs. Expect total underlayment replacement costs to run anywhere from $1,000 to $4,000+ depending on roof size, complexity, and chosen materials. Lifespan: How Long Does It Last? Most underlayments don’t match the 50+ year lifespan of tile itself, so expect to replace the underlayment at least once during the tile roof’s lifetime. Routine inspections every 4–5 years are key to catching wear before it turns into leaks. Installation Process: What to Expect Installing underlayment under tile isn’t a quick weekend project. Here’s the general process: Weather matters – most underlayments need to be installed in dry conditions and above 40°F to bond properly. Stop Roof Leaks Before They Start Avoid costly damage with the right underlayment. BOOK FREE APPOINTMENT Can Underlayment Be Reused? Short answer: No. Even if your tiles still look good, the underlayment beneath them ages, deteriorates, and may not seal properly a second time around. Most roofing pros will always recommend replacing it during repairs or reroofing. It’s not worth the gamble. Signs Your Underlayment Needs Replacing You won’t see underlayment failure directly, but you will see the effects: Don’t ignore those signs. Get a professional in to take a look before minor damage becomes major. Common Mistakes to Avoid Frequently Asked Questions Can you install tile roofing without battens? Yes, but it depends on the system. Some tile roofs use a “direct-to-deck” method without battens, though battens are often recommended to improve drainage and ventilation beneath tiles. Does underlayment go over or under flashing? It depends on the location. Typically, underlayment goes under drip edge at the eaves and over the drip edge at the rake. Proper layering is crucial to ensure water sheds away from the roof deck. What’s the best underlayment for low-slope tile roofs? Self-adhered rubberized asphalt membranes are best for low-slope areas, as they provide full waterproofing where water might pool or drain slowly. How long can underlayment be exposed before installing tiles? Most synthetic underlayments can be exposed for 60–180 days, depending on the product. However, prolonged exposure increases risk, so tiles should ideally be installed as soon as possible. Conclusion If there’s one thing to take away from all this – it’s that tile roof underlayment is a major factor in how well your roof holds up over the years. The type you choose, how it’s installed, and whether it fits your climate all play a role in how long your roof lasts and how much you end up spending on repairs. From synthetic to rubberized asphalt, each option comes with trade-offs in durability, cost, and protection. And while tile itself may last 50+ years, underlayment won’t, so knowing when to replace it is just as important. If you’re dealing with leaks, a worn-out roof, or you’re not sure what’s under your tile in the first place, book
Tile Roof Maintenance | Full Guide 2025

Tile roofs are built to last, but they won’t do it alone. With the right upkeep, they can protect your home for 50, 75, even 100 years. The trick isn’t constant maintenance, it’s smart maintenance. Whether you’ve got clay, concrete, or slate, we’ll break down what to look for, how to keep your roof in top shape, and what to fix before small issues turn into big ones. Key Notes Tiles last 50-100+ years but underlayment, flashing, and mortar require regular maintenance. Clay, concrete, and slate tiles each need different care approaches for cleaning and repairs. Annual inspections should check for cracked tiles, failing flashing, debris, and biological growth. DIY tasks include gutter cleaning and debris removal; leave tile repairs to professionals. How Tile Roofs Age: What Makes Maintenance So Important Tile roofs age differently than asphalt or metal. The tiles themselves are tough – they can resist wind, sun, and rain for decades. But the underlayment, flashing, and mortar? Those parts aren’t quite as invincible. That’s where maintenance comes in. Neglect cracked tiles or failing flashing, and you could end up with water intrusion, attic mold, structural wood rot, or even rising energy bills. Regular maintenance helps you catch small issues early and keeps the waterproof barrier intact, ensuring your tile roof lasts as long as it was built to. Types of Tile Roofs & What Maintenance Each One Needs Clay Tiles Long-lasting and color-stable, clay tiles resist algae but are prone to cracking in freeze-thaw climates. Gentle cleaning and regular inspections are key. If maintained well, clay tiles can last over 100 years. Concrete Tiles These are more porous than clay, so they absorb moisture and are prone to moss, algae, and staining. Expect more frequent cleaning. Concrete tile roofs also typically require underlayment replacement around the 20-year mark. Slate Tiles The heavyweight champion of durability. Slate resists water and biological growth naturally, making it the lowest-maintenance tile type. But if repairs are needed, they require specialist care (and a bigger budget!). Routine Tile Roof Maintenance Checklist Tile roofs don’t need constant attention, but they do benefit from routine care. Here’s your annual playbook: Seasonal or Post-Storm Tasks: Annual Must-Dos: Pro tip: Always use crawl boards or protective pads if accessing the roof. One misstep and you could crack several tiles – or worse. Spotting Trouble Early: Signs Your Tile Roof Needs Attention Not sure if your roof needs a little love? Look out for: Catch these early, and you’ll save yourself a world of hassle later. DIY vs. Pro: What You Can Safely Handle DIY-Friendly Tasks: Leave to the Pros: Even if you’re handy, walking on tile roofs is tricky. The tiles are fragile and slippery, and it doesn’t take much pressure to cause expensive damage. Cleaning Tile Roofs Without Causing Damage Forget the pressure washer – tile roofs and high-pressure water are not friends. Here’s how to clean safely: Best Practices: Avoid: For extensive buildup? Bring in a pro. Better safe than sorry. Underlayment: The Hidden Lifespan Threat Underneath your tiles lies the true waterproofing MVP: the underlayment. It’s what keeps moisture from seeping into your roof deck if a tile breaks or shifts. Lifespan: Signs it might be failing: Underlayment replacement is a big job, but it’s non-negotiable if deterioration sets in. Ignoring it is a fast track to structural damage. Waterproofing & Sealants: Do Tile Roofs Need Them? Tile roofs are water-resistant by design, but that doesn’t mean they’re waterproof. Sealants can extend lifespan and reduce biological growth. When sealing helps: Types of Sealants: Climate Factors That Impact Tile Roof Maintenance Where you live matters. A lot. Maintenance schedules should reflect your climate realities. One-size-fits-all doesn’t cut it here. Gutter Maintenance & Its Role in Protecting Tile Roofs You can’t talk about tile roof maintenance without talking gutters. Why it matters: What to do: Repair or Replace? Sometimes a simple tile swap does the trick. Other times, it’s time to throw in the towel (or the tiles). Choose repair when: Go for replacement when: A professional inspection is the best way to make the call. Common Mistakes That Shorten Tile Roof Lifespan Avoid these, and your roof will thank you. Pro Tips for Extending the Life of Your Tile Roof Extend The Life Of Your Tile Roof Catch issues early with expert repair or replacement. Book Free Appointment Frequently Asked Questions Can solar panels be installed on a tile roof without damaging it? Yes, but it requires specialized mounting systems and installers experienced with tile roofing. Panels should be installed with care to avoid cracking tiles or compromising the waterproofing. Do tile roofs need ventilation for proper performance? Yes. Good attic ventilation helps regulate moisture and heat buildup under the tiles, which extends the life of both the roof structure and underlayment. What time of year is best for tile roof maintenance or repair? Spring and fall are ideal. Weather conditions are mild, and you can catch issues caused by winter storms or prep for summer heat. Are tile roofs more resistant to fire than other roofing types? Yes. Tile roofs (especially clay and concrete) are naturally fire-resistant, making them a great choice in wildfire-prone regions. However, fire-rated underlayment also plays a role. Conclusion Tile roof maintenance isn’t something most people think about – until they’re dealing with leaks, slipped tiles, or stained ceilings. But a bit of regular care goes a long way. Whether your roof’s made of clay, concrete, or slate, keeping it in good shape comes down to three things: routine inspections, gentle cleaning, and acting fast when something’s off. From underlayment issues to broken tiles and blocked gutters, the risks of waiting too long are real (and often expensive!). If you’ve spotted something that doesn’t look quite right, or just want peace of mind that everything’s still solid up there, we’re here to help. Book a free appointment today for expert repair, honest recommendations, and long-term protection for your home.
Tile vs Asphalt Roof | Which To Choose?
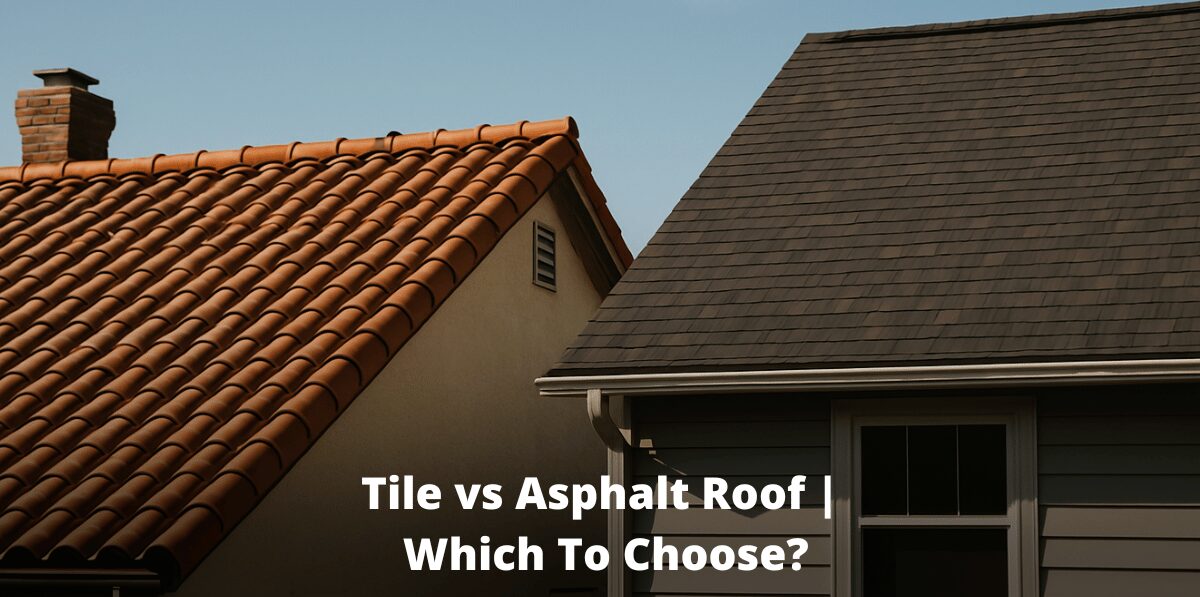
Choosing a roof isn’t exactly thrilling, but mess it up and you’ll feel it for decades. Tile or asphalt? One costs more now but lasts forever. The other’s easier on your wallet today but might bail on you sooner. We’ll cut through the noise and lay it all out—costs, lifespan, weather resistance—so you can pick the roof that actually fits your home and your budget. Key Notes Tile roofs last 50-100 years, while asphalt shingles typically survive 15-30 years. Asphalt costs $4-22 per square foot; tile ranges from $13-75 installed. Climate significantly impacts which roofing material performs best for your home. Your home’s structural capacity determines if tile’s weight requires additional reinforcement. Overview: Tile vs Asphalt Roof Feature Tile Roof Asphalt Shingles Lifespan ✔️ ❌ Upfront Cost ❌ ✔️ Maintenance ✔️ ❌ Weather Resistance ✔️ ❌ Energy Efficiency ✔️ ❌ Installation Time ❌ ✔️ Tile Roofing Tile roofs have been around for centuries. They come in different materials, like clay, concrete, and slate – each with unique perks. Clay tiles hold their color and resist fading, concrete tiles are cheaper but heavier, and slate brings a premium look with extreme durability. They thrive in hot climates, standing up to sun exposure without breaking a sweat. If you want something long-lasting with a timeless appeal, tile roofing might be your match. Core Features Longevity: Tile roofs last between 50 to 100 years, making them one of the most durable roofing options available. Fire, Rot, and Insect Resistance: Naturally resistant materials mean less damage from pests, decay, and fire hazards. Energy Efficiency: The thermal properties of tile help regulate indoor temperatures, reducing heating and cooling costs. Weather Resistance: Built to withstand extreme conditions, including hurricanes and wildfires, tile roofs offer superior protection. Advantages of Tile Roof Boosts home value Minimal maintenance Variety of colors, shapes, and styles Disadvantages of Tile Roof Expensive upfront Needs structural reinforcement Fragile under impact Price Tile roofing isn’t cheap, but it’s built for the long haul. Prices vary based on material and installation complexity. Tile Type Material Cost (per sq. ft.) Installation Cost (per sq. ft.) Clay $10 – $30 $12 – $20 Concrete $4 – $10 $9 – $18 Slate $15 – $45 $20 – $30 Asphalt Shingle Roofing Asphalt shingles are made from fiberglass or organic materials coated with asphalt and granules. Architectural shingles offer a dimensional look, while three-tab shingles provide a basic, budget-friendly option. These roofs are easy to install, relatively light, and widely available. If affordability and versatility matter most, asphalt shingles fit the bill. Core Features Asphalt Shingles offer numerous benefits for homeowners: Lifespan: Typically lasting 15 to 30 years, asphalt shingles provide reliable coverage for decades. Lightweight and Easy Installation: Unlike heavier roofing materials, asphalt shingles don’t need structural reinforcement, making installation quick and straightforward. Style Variety: Available in numerous colors and designs, asphalt shingles allow homeowners to match their roof to their personal style. Reinforced Weather Resistance: Enhanced options withstand strong winds, hail, and heavy rain, offering improved durability in storm-prone regions. Advantages of Asphalt Roof Budget-friendly Easy repairs and replacements Works with most home structures Disadvantages of Asphalt Roof Shorter lifespan Less resistant to extreme weather Not as energy-efficient Price Asphalt shingles are the go-to choice for cost-conscious homeowners. Pricing depends on the type and quality of the shingles. Shingle Type Material Cost (per sq. ft.) Installation Cost (per sq. ft.) Three-tab $1 – $4 $3 – $7 Architectural $4 – $7 $5 – $10 Premium $7 – $12 $10 – $15 How to Choose What’s Best for You Not sure which way to go? Take these factors into consideration: Your Budget If you’re working with a tighter budget, asphalt shingles win, hands down. Tile roofing is an investment, but one that pays off in longevity and home value. Structural Needs Tile is heavy. Your home needs a reinforced structure to handle the weight. Asphalt shingles are lightweight and work on most houses without extra reinforcement. Climate and Weather Conditions Live in a hot, sunny area? Tile roofing reflects heat and keeps your home cool. If storms or freezing temperatures are common, reinforced asphalt shingles hold up better. Aesthetic Preferences Tile adds character and elegance, while asphalt shingles provide versatility. If you want a classic Mediterranean or Spanish look, tile roofing is the way to go. If you prefer modern and budget-friendly, shingles do the job. Longevity and Maintenance Tile roofs last longer but need professional handling if repairs are required. Asphalt shingles are easier to replace but won’t last as long. Still Torn Between Tile And Shingle? We’ll help you weigh the tradeoffs—and install it right the first time GET FREE QUOTE NOW Frequently Asked Questions Tile vs. asphalt roof cost: Which is more expensive? When looking at tile vs asphalt roof cost, tile roofing costs significantly more upfront, ranging from $10 to $45 per square foot, while asphalt shingles cost $1 to $12 per square foot. However, tile lasts much longer, making it a better long-term investment. What are the disadvantages of a tile roof? There are a few disadvantages to a tile roof. It’s expensive and heavy, needing structural reinforcement. It’s also brittle under impact, making it prone to cracking if stepped on incorrectly. Is a tile or shingle roof better? The choice between a tile or shingle roof depends on your priorities. Tile roofs offer longevity, durability, and energy efficiency, but asphalt shingles are more affordable and easier to install. Conclusion Both tile and asphalt roofs have their strengths—and your choice really comes down to what matters most to you. Want a roof that could outlast you? Tile’s got that timeless edge, though it comes with a heavier price tag (literally and financially). Leaning toward practicality and quicker installation? Asphalt shingles give you solid coverage without the upfront cost shock. Curious what makes sense for your home? Reach out today for a free quote on professional roofing installation or repair.
How To Install Tile Roof in 7 Steps

Thinking about installing a tile roof? It’s a big job—definitely not a quick weekend project. Tile roofing looks incredible and lasts for decades, but it’s heavier, trickier, and way less forgiving than asphalt shingles. Whether you’re going for concrete, clay, or slate, getting it right from the start is key. We’ll break it down step by step, so you know exactly what it takes—before you’re knee-deep in roofing materials. Key Notes Tile roofs need structural evaluation before installation as they’re heavier than standard shingles. Different tile types (concrete, clay, slate) need specific overlap measurements and fastening methods. A properly installed tile roof lasts 50-100 years with minimal maintenance. Step 1: Roof Inspection and Preparation Before anything touches your tile roof, check its structure. Tile is heavier than asphalt shingles, and not every roof is built to hold that kind of weight. A structural engineer or roofing professional can determine if reinforcements are necessary. Assess the current roof deck: Look for water damage, rot, or weak areas. If the deck isn’t solid, the tiles won’t have a stable foundation. Calculate weight load: Clay and slate tiles are significantly heavier than asphalt. If your home isn’t designed for the extra load, you’ll need reinforcements. Check local building codes: Some areas have regulations on tile types, installation methods, and fastening requirements. Step 2: Removing the Existing Roof Material If you’re replacing an old roof, strip it down to the decking. This means removing old shingles, nails, and flashing. Work carefully to avoid damaging the deck underneath. Leaving debris behind can create uneven spots that lead to improper tile placement. Step 3: Installing Underlayment Every tile roof starts with a strong moisture barrier. This layer protects the structure from leaks and extends the roof’s lifespan. Choose the right underlayment: Options include synthetic, asphalt-saturated felt, and rubberized materials. For high-moisture areas, go with a waterproof synthetic underlayment. Overlap each layer properly: Underlayment should overlap by at least six inches to prevent water intrusion. Secure it in place: Fasten underlayment with cap nails or staples, keeping it smooth and free of wrinkles. Pro Tip: Many regions call for double underlayment when using clay tiles. It adds an extra barrier against leaks, especially in wet climates. Step 4: Installing Battens (If Needed) Not every tile roof needs battens, but they’re useful for better drainage and airflow. They create a grid-like structure for the tiles to sit on and prevent water from getting trapped underneath. Select the right size: Battens should be at least one inch thick to allow for proper drainage. Space them correctly: The spacing depends on tile size and manufacturer specifications. Secure with corrosion-resistant nail: Battens should be nailed down firmly but not over-tightened. Step 4: Installing Battens (If Needed) Not every tile roof needs battens, but they’re useful for better drainage and airflow. They create a grid-like structure for the tiles to sit on and prevent water from getting trapped underneath. Select the right size: Battens should be at least one inch thick to allow for proper drainage. Space them correctly: The spacing depends on tile size and manufacturer specifications. Secure with corrosion-resistant nail: Battens should be nailed down firmly but not over-tightened. Step 5: Laying and Securing the Tiles This step calls for precision. Start at the bottom and work your way up, overlapping tiles according to manufacturer guidelines. The placement varies by material. How to Tile a Roof with Concrete Tiles Concrete tiles interlock, making installation slightly easier. Each tile overlaps the one below it by about 3 inches. Fasten the tiles using corrosion-resistant nails or clips, ensuring they sit flush. How to Tile a Roof with Plain Tiles Plain tiles are smaller and do not interlock. They need at least 4 inches of overlap to prevent leaks. Each tile is individually nailed down, making installation more time-consuming but highly secure. How to Tile a Roof with Slate Slate tiles need precision. Overlapping is important, usually between 4 to 6 inches, depending on the roof pitch. Each tile is nailed twice, but the nails shouldn’t be driven too tight as the slate expands and contracts with temperature changes. Step 6: Installing Ridge and Hip Tiles Ridge and hip tiles give the roof its finished look while preventing leaks along the seams. Use the correct fasteners: Some ridge tiles are nailed down, while others use a mortar bed or adhesive. Seal the edges properly: Apply roofing cement or sealant to prevent wind and rain from getting underneath. Step 7: Flashing & Sealing Flashing is installed around chimneys, vents, and valleys to direct water away from these vulnerable areas. Use metal flashing for durability: Aluminum or copper works best. Install flashing under tiles, not on top: This prevents water from seeping underneath. Seal edges with a waterproof membrane: This adds an extra layer of protection against leaks. Quick Comparison: Tile Roof Installation Tile Type Overlap Fastening Durability Concrete 3 inches Nails or clips 50+ years Plain 4 inches Nailed individually 60+ years Slate 4-6 inches Two nails per tile 100+ years Clay 3-4 inches Nails or mortar bed 75+ years Professional vs. DIY Installation Hiring a professional ensures the job is done right, but it comes at a cost. If you’re comfortable with roofing work and safety measures, DIY installation might be an option. But do know that installing a tile roof is not a DIY job for the faint of heart. Mistakes in nailing, overlap, or underlayment can lead to major leaks. Hiring a Professional Ensures proper installation and adherence to local codes. Usually includes a warranty on labor and materials. Is recommended for complex roof designs or heavy materials like slate. DIY Installation Can save on labor costs but requires time and experience. Mistakes can lead to costly repairs. Not recommended for steep or intricate roofs. Want A Tile Roof That Outlasts Your Mortgage? We ensure proper weight distribution and weatherproofing GET FREE QUOTE NOW Frequently Asked Questions What do you put under roof tiles? You put a waterproof underlayment under
Tile Roof Repair Cost [2025]
A cracked tile here, a small leak there—seems minor, right? Until it’s not. Tile roof repairs can range from a quick fix to a full-on budget breaker. Whether you’re dealing with a few loose tiles or a major structural issue, knowing what to expect cost-wise can save you from sticker shock. We’ll break down the numbers, so you know exactly what you’re up against. Key Notes Tile material dramatically affects repair costs. Small repairs start at $150, while major structural issues can hit $8,000+. Roof size matters—large 2,000+ sq ft roofs need $7,000 – $24,000 budgets. Cost Breakdown: Tile Roof Repairs Expense Type Cost Range Tile Repair per Square Foot $5 – $25 Underlayment Replacement $400 – $900 per square Roof Removal and Disposal $1,000 – $1,500 Sealing and Waterproofing $500 – $1,000 Labor Costs $45 – $75 per hour Pro Tip: Try to catch damage early on to stop minor issues from becoming expensive headaches. Factors Affecting Tile Roof Repair Costs Keeping a tile roof in top shape isn’t just about looks—it’s about protecting your home from the elements and avoiding costly repairs down the line. Whether you’ve got a Mediterranean-style clay roof or sturdy concrete tiles, understanding the tile roof repair cost for 2025 can save you from budget surprises. 1. Type of Tile Material The type of tile material you choose plays a major role in the cost and longevity of your roof. Different materials offer unique benefits, so it’s worth understanding what each brings to the table before considering the price. Concrete Tiles Concrete tiles are durable, resistant to harsh weather, and offer a range of styles and colors. They are also relatively low-maintenance and provide good insulation. The concrete tile roof cost for repairs ranges from $500 to $2,500. Clay Tiles Clay tiles bring a classic, Mediterranean look to your home. They are highly durable, fire-resistant, and can withstand extreme weather conditions. Clay tiles also have excellent insulation properties, helping to keep your home cooler in the summer. The clay tile roof cost per square foot for repairs sits between $500 and $2,500. Slate Tiles Slate tiles are the premium choice for tile roofing. They are exceptionally durable, often lasting over 100 years with proper care. Slate is naturally resistant to fire, water, and weather damage, making it a strong investment if you plan to stay in your home long-term. However, this luxury comes at a higher price, with repair costs averaging around $1,800. 2. Extent of Damage Whether it’s a minor leak or significant structural issues, the extent of the damage directly impacts your bill. Small repairs, like replacing a single tile, might only set you back $150 to $1,000. Moderate repairs involving leaks or damaged sections can range from $1,000 to $5,000. If your roof needs major structural repairs, you might be looking at $5,000 to $8,000—or more. A single broken tile can sometimes cause leaks far from the actual damage. Water can travel under tiles and appear in unexpected spots, which is why even small repairs shouldn’t be ignored. 3. Roof Size and Complexity Bigger roofs naturally mean higher costs. Complexity matters too—steeper or uniquely shaped roofs demand more labor, which drives up costs. Repairing a small roof (about 1,000 sq ft) could cost between $3,500 to $12,000. For medium roofs (1,500 sq ft), expect to spend $5,250 to $18,000. Large roofs (2,000+ sq ft) can require budgets from $7,000 to $24,000. 4. Additional Services You may need extra services when repairing your tile roof to safeguard the longevity and effectiveness of repairs. Each adds to the total cost but can prevent future issues and protect your home. Underlayment Replacement The underlayment is a waterproof barrier beneath your roof tiles. It helps stop leaks and moisture damage to the roof’s structure. Replacing underlayment on a tile roof costs anything from $400 to $900 per square (100 sq ft). Roof Removal and Disposal If your roof needs a complete overhaul, old tiles must be removed and disposed of properly. This process can add $1,000 to $1,500 to your bill. Sealing and Waterproofing Sealing and waterproofing provide extra protection, keeping your roof watertight and extending its lifespan. This service generally costs between $500 and $1,000. 5. Labor Costs Roofers usually charge between $45 to $75 per hour, but specialized work or complex repairs increase this rate. It’s smart to get multiple quotes to ensure you’re not overpaying for labor. Professional Repair Hiring a professional roofing contractor ensures the job is done safely and correctly. Pros have the experience and tools needed to handle complex repairs, including waterproofing and structural fixes. However, professional labor costs can add up, especially for larger projects or premium materials. DIY Repair If you’re handy and have roofing experience, taking on smaller repairs yourself could save money. DIY repairs work well for minor tile replacements or basic sealing tasks. But climbing onto your roof and working with heavy tiles poses safety risks. What’s more, mistakes lead to problems later on and potentially cost more than hiring a professional in the first place. 6. Geographical Location Where you live affects labor and material costs. Urban areas and regions with higher living costs typically have higher repair costs. Material availability and local climate conditions also play a role in determining your final bill. Tile Roof Repairs Adding Up? Big or small, we make repairs easy and affordable GET FREE QUOTE NOW Frequently Asked Questions What is the life expectancy of a tile roof? Tile roofs can last 50 years or more with proper maintenance. Concrete and clay tiles are particularly durable, though underlayment might need replacing every 20-30 years. How much does it cost to replace underlayment on a tile roof? Replacing underlayment generally costs $400 to $900 per square (100 sq ft). This expense is often necessary for maintaining the roof’s waterproofing. Can a tile roof be repaired? Yes, most tile roofs can be repaired. Whether it’s a cracked tile or a small leak, addressing issues early can extend your