7 Best Shed Roofing Materials & Types in 2025

Picking the right shed roofing material isn’t always as straightforward as it sounds. Some options last for decades, others are easy to install on a weekend, and a few come down to how much you care about looks versus price. Plus, there are trade-offs in cost, lifespan, and even how much light your shed gets. We’ll break down the seven best shed roofing materials and when each one makes the most sense. Our Top 3 Picks Best for Budget Sheds Bitumen Roof Felt VIEW NOW Best for Maximum Lifespan EPDM Rubber Roofing VIEW NOW Best for Premium Aesthetics Clay Roof Tiles VIEW NOW 1. Bitumen Roof Felt Best Budget Shed Roofing Material Bitumen roof felt is one of the most common shed roofing materials. It’s affordable, straightforward to work with, and offers reliable protection against the elements. Typically made from bitumen-soaked fibers reinforced with polyester or fiberglass, it can be found in several forms – self-adhesive, nail-on, or torch-on felt. While it won’t last as long as premium options, it’s a practical choice for budget-conscious homeowners who need a solid, no-frills solution. Features Waterproof and weather-resistant for reliable protection Lightweight rolls, easy to handle and install Multiple application methods (adhesive, nails, or torch-on) Affordable compared to other shed roofing materials Optional mineral surface coatings for UV resistance Fits flat, apex, or pent shed roofs Lifespan of 10–15 years with care Pros: Very cost-effective option Straightforward installation, especially with self-adhesive felt Provides dependable waterproofing for small sheds Lightweight and easy to transport Works with a wide variety of roof designs Simple to repair or replace damaged sections UV-resistant when mineral-coated Cons: Shorter lifespan than premium materials (around 10 years) Can tear under heavy stress or extreme weather Limited aesthetic appeal (mostly dark, plain finishes) Torch-on application requires skill and safety precautions Can become brittle in prolonged heat without a top layer Less effective if water pools on the roof 2. EPDM Rubber Roofing Best Long-Lasting Shed Roofing Material If you’re looking for a shed roofing material that you won’t have to worry about replacing anytime soon, EPDM rubber is hard to beat. This synthetic rubber membrane is known for its durability and seamless waterproof coverage. It’s widely used on flat or low-pitched roofs, making it ideal for sheds, workshops, and even summerhouses. While it costs more upfront than felt, its 30–50 year lifespan makes it one of the most cost-effective options in the long run. Features Single-ply rubber membrane (typically 1.14mm thick) Installed in large, seamless sheets for watertight coverage UV, ozone, and weather-resistant Flexible in low temperatures and during building movement Resistant to hail, abrasion, and thermal shock Life expectancy of 30–50 years Often backed by a 20-year warranty Low maintenance, easy to clean Repairable if punctured Eco-friendly and recyclable Pros: Extremely long lifespan (30–50 years or more) Seamless waterproofing with no weak points Withstands harsh weather and temperature swings Very low maintenance needs Saves money over time by reducing replacements DIY-friendly with proper guidance Flexible and durable under movement Recyclable and eco-conscious Cons: Limited aesthetic appeal (plain black/grey finish) Installation must be done correctly to avoid leaks Vulnerable to sharp objects or punctures Can retain heat in hot climates Adhesive-based installation can be tricky for some DIYers 3. Felt Shingles Best Budget-Friendly Shed Roofing with Style Felt shingles give you the affordability of traditional felt but with a more decorative finish. Made from bitumen-coated sheets topped with protective granules, they come in a variety of colors and shapes – from hexagonal to scalloped designs – making them a good fit if you want your shed to look neat without breaking the bank. While they won’t last as long as premium tiles or metal, they balance price, appearance, and practicality for small structures. Features Bitumen-coated felt with embedded granules Lightweight and flexible sheets or strips Available in black, green, red, and other styles Easy installation for DIYers and tradespeople Protective against rain and UV damage Suitable for flat or pitched shed roofs Sold in interlocking strips or overlapping pieces Pros: Affordable compared to tiles or metal shingles Waterproof and UV-resistant Lightweight, reducing structural stress Easy DIY-friendly installation Available in multiple colors and patterns Simple to repair or replace when needed Provides a more polished look than plain felt Cons: Shorter lifespan than premium roofing options Needs more frequent maintenance over time Can tear or crack with age or impact Not suitable for permanent residential roofs Vulnerable if left exposed before installation Doesn’t handle heavy foot traffic well 4. Wood Shingles & Cedar Shakes Best Premium Shed Roofing for Natural Style If you want your shed roof to look as good as your home’s, cedar shingles and shakes deliver timeless appeal. Shingles are machine-cut for a smooth, uniform finish, while shakes are hand-split for a rustic, textured look. Beyond appearance, cedar’s natural oils make it resistant to rot and insects, and when properly maintained, these roofs can last 30–40 years or more. The trade-off? They’re pricier than most shed roofing materials and demand regular upkeep. Features Made from cedar, offering natural decay and insect resistance Shingles = smooth, uniform; shakes = rustic, textured, thicker Lifespan: 30–40+ years with maintenance Shakes are more durable but harder to install than shingles Provide natural thermal insulation, regulating shed temperature Eco-friendly and biodegradable, often sustainably sourced Pros: Distinctive aesthetic with upscale, natural character Long-lasting compared to asphalt or felt (30+ years) Cedar’s oils protect against rot and pests Adds thermal insulation for cooler summers and warmer winters Can handle severe storms and high winds Environmentally friendly, renewable resource Cons: High upfront cost, especially for shakes Require ongoing maintenance (cleaning/treating every 2–4 years) Fire risk unless specially treated Susceptible to splitting, curling, or darkening if neglected Shakes require professional installation and extra underlayment 5. Polycarbonate Sheets Best Shed Roofing for Light & Versatility Polycarbonate sheets are a great choice if you want a shed roof that lets
Guide To Rolled Roofing | Everything To Know

Not every roof needs a lifetime investment, and not every project calls for architectural shingles or sleek metal panels. Sometimes you just need something practical, fast, and affordable to keep the rain out. That’s where rolled roofing comes in. It’s not fancy, but it serves a purpose – and knowing when it’s the right choice matters. We’ll cover everything you should know about rolled roofing, from costs and types to installation and alternatives. Key Notes Five main types range from basic asphalt rolls (5-10 years) to EPDM rubber (20+ years). Best applications: flat/low-slope roofs on garages, sheds, and secondary structures under 4:12 pitch. Total installed costs run $2.00-$5.50 per sq ft including materials and professional labor. Lifespan averages 5-15 years, requiring more frequent replacement than shingles or metal. What is Rolled Roofing? Rolled roofing is an asphalt-based roofing material manufactured in long rolls, typically 36 inches wide and 33–36 feet long. One roll covers about 100 square feet of surface area. Unlike shingles, which are laid in overlapping rows, rolled roofing is applied in wide sheets, creating a continuous, waterproof membrane when properly installed. It’s made from similar ingredients to asphalt shingles – fiberglass or felt saturated with asphalt, then topped with protective mineral granules – but comes in a simpler, more lightweight form. Because it installs so quickly, it’s a go-to choice for smaller projects or budget-conscious roofing jobs. Types of Rolled Roofing Not all rolled roofing is created equal. Here are the main types you’ll encounter: Asphalt Roll Roofing Standard and affordable. Made from asphalt-saturated felt or fiberglass with mineral granules. Lifespan: about 5–10 years. Best for sheds, porches, and other secondary structures. Modified Bitumen Roll Roofing Asphalt mixed with plastic or rubber modifiers for added flexibility. Can be installed with adhesive, nails, or heat (torch-down). Lifespan: closer to 15–20 years. More durable option for low-slope roofs. Rubber Roll Roofing Made from recycled tires and other materials. Flexible, budget-friendly, and eco-conscious. Performs decently but usually falls short of modified bitumen in durability. EPDM Rolled Roofing Synthetic rubber material commonly used in commercial roofing. Extremely resistant to UV and weather. Lifespan: 20+ years. More expensive but highly durable. TPO Rolled Roofing Thermoplastic polyolefin membrane. Requires heat-welded seams, making it more complex to install. Lifespan: 20+ years. Popular for commercial flat roofs. Other Variations Fiberglass roll roofing (lighter and stronger than felt-based). Peel-and-stick rolls for quick DIY projects. Pros: Low cost Quick installation (hours, not days) Lightweight and easy to transport Waterproof when properly installed Works well for sheds, garages, and flat roofs Cons: Shorter lifespan (5–15 years) Limited aesthetics (flat, plain appearance) Less durable in harsh weather Higher maintenance needs Not suited for steep roofs or high-visibility areas Where and When to Use Rolled Roofing Rolled roofing is best in very specific situations. It shines when: Low-slope or flat roofs: Works best on slopes between 1:12 and 4:12. Secondary structures: Garages, sheds, porches, carports, and barns. Temporary solutions: Emergency repairs or quick protection during renovations. Budget projects: When cost matters more than aesthetics. Where it shouldn’t be used: Steeply pitched roofs (3:12 and above). Roofs prone to ponding water or poor drainage. High-end homes where curb appeal is a priority. Cost of Rolled Roofing Rolled roofing is one of the cheapest roofing systems available. Here’s what to expect: Material cost: $0.50–$1.50 per sq. ft. Installation labor: $1.50–$4.50 per sq. ft. Removal of old roofing (if needed): $1.00–$2.00 per sq. ft. Installed total: $2.00–$5.50+ per sq. ft. For a 1,200 sq. ft. roof, that’s about $2,500–$4,800 professionally installed. Cost Comparison Roofing Type Price Range (per sq. ft.) Rolled Roofing $2–$5.50/sq. ft. Asphalt Shingles $3–$7/sq. ft. Metal Roofing $8–$14/sq. ft. Tile Roofing $10–$20+/sq. ft. Lifespan, Durability & Maintenance Rolled roofing usually lasts 5–15 years depending on material type and climate. That’s shorter than shingles (15–30 years) and far less than metal (40+ years). Factors that shorten lifespan: Extreme sun or heat (cracking, drying out). Freezing climates (brittleness, seam separation). Poor installation or lack of drainage. Factors that extend lifespan: Using higher-grade materials like modified bitumen or EPDM. Professional installation with proper sealing. Routine maintenance: inspections, cleaning, patching cracks. Maintenance Checklist: Inspect twice a year and after storms. Remove debris and clean gutters. Patch cracks, re-seal seams, and apply protective coatings. Installation of Rolled Roofing Preparation: Clean and repair roof deck. Add underlayment and drip edges. Methods: Adhesive (cold-applied): Easy and mess-free for small jobs. Peel-and-stick (self-adhered): Great for quick DIY installs. Torch-down: Professional-grade and durable but risky for DIY. Nail-down: Less common, used mainly for reinforcement. Common DIY Mistakes: Poor surface prep. Skipping underlayment. Incorrect overlaps or sealing. Using in bad weather. DIY vs Professional: DIY: Possible for small sheds and garages. Professional: Recommended for larger or occupied structures. Key Advice for Homeowners Rolled roofing makes sense for certain projects, but not all. If you’re re-roofing a shed or need quick protection, it’s a solid choice. For your main home, shingles or metal will likely serve you better in the long run. Always weigh the upfront cost against long-term value, and if you’re unsure, get a professional opinion. Installation and material quality matter more than most people realize. Need The Right Roof For Your Home? We’ll inspect & compare options to find the best fit. BOOK YOUR FREE APPOINTMENT Frequently Asked Questions Can rolled roofing be painted or coated for longer life? Yes. Applying reflective or elastomeric roof coatings can help protect rolled roofing from UV rays and extend its lifespan. It also improves energy efficiency by reducing heat absorption. Does rolled roofing come in different colors? Most rolled roofing is black or gray, but some products are available in green, brown, or white. Color options are limited compared to shingles or metal roofing. How do you know when rolled roofing needs replacement? Look for cracks, blisters, curling edges, or granule loss. Frequent leaks or large soft spots usually mean it’s time for a full replacement rather than patching. Is rolled roofing allowed by building codes everywhere? Not always.
Modified Bitumen vs Roll Roofing | Cost & Applications

Flat or low-slope roof projects come with plenty of decisions, and choosing the right material is one of the big ones. Modified bitumen and roll roofing both show up as options, but they serve very different needs. Whether you’re looking for long-term durability or something quick and cost-effective, we’ll break down what each option brings to the table so you can make the right call for your roof. Quick Overview: Modified Bitumen vs Roll Roofing Feature Modified Bitumen Roll Roofing Lifespan 15–30 years 5–15 years Installation Professional, multi-layer DIY-friendly, single-layer Materials Polymer-modified asphalt Asphalt felt or fiberglass Weather Resistance Excellent Basic Cost Higher upfront Lower upfront Best For Long-term protection Temporary/small structures What is Modified Bitumen Roofing? Modified bitumen is a type of asphalt roofing that’s been, well, modified – by adding rubber or plastic polymers to improve its strength, flexibility, and weather resistance. It’s usually installed in two or three layers using heat (torch-down), cold adhesives, or self-adhesive membranes. Those layers make it incredibly resilient, and with proper installation, it can last 20+ years. Best for: Commercial buildings, flat-roofed homes, garages, and any structure where durability and waterproofing matter. What is Roll Roofing? Roll roofing (or rolled roofing) is a more basic asphalt-based product that comes in large rolls. It’s often made of asphalt-saturated felt or fiberglass with a top layer of mineral granules for UV protection. It’s usually applied in a single layer and either nailed, glued, or self-adhered. It’s easy to install – especially for small or temporary structures – but it just doesn’t hold up as well long-term. Best for: Sheds, garages, low-cost or temporary buildings, and quick patch jobs. Materials & Construction Differences Modified Bitumen Materials: Polymer-modified asphalt (SBS or APP) Reinforcement layers like polyester or fiberglass Multi-ply systems (2- or 3-layer) Roll Roofing Materials: Asphalt-saturated organic felt or fiberglass Coated with asphalt and topped with mineral granules Single-layer application The added polymers in modified bitumen (such as SBS for flexibility or APP for UV resistance) give it a serious edge in tough climates. Roll roofing, however, is more brittle, more prone to cracking, and less protective—especially over time. Installation Process: Time, Tools & Skill Required Modified Bitumen Installation: Labor-intensive and best left to pros Requires special equipment: torches, rollers, safety gear Methods: torch-down (open flame), cold adhesive, or self-adhesive sheets Seams are sealed with heat or adhesives for waterproofing Takes longer but creates a tough, layered barrier Roll Roofing Installation: DIY-friendly and quick Rolled out in strips and fastened with nails or adhesives Seams sealed with roofing cement Requires basic tools: hammer, utility knife, cement Less time, less hassle – but lower durability Cost Comparison Roofing Type Installed Cost (per sq ft) Labor Materials Modified Bitumen $4.00–$7.50 $2.30–$4.00 $0.70–$2.20 Roll Roofing $2.00–$5.50 $1.50–$4.00 $0.50–$1.50 Modified bitumen has a higher upfront price tag, but that comes with significantly longer lifespan and better performance. Roll roofing is more affordable to install, especially if you’re doing it yourself, but the total cost over time often adds up. Don’t forget hidden costs: Roof deck prep, tear-off, flashing, permits, and potential safety measures (especially with torch-down) can add to the final number. Durability, Lifespan & Maintenance Modified Bitumen: Lifespan: 15 to 30 years Resistant to cracking, impact, UV damage Easy to maintain and patch professionally Requires occasional inspection and sealing Roll Roofing: Lifespan: 5 to 15 years More prone to granule loss, cracking, and leaks Requires frequent patching, especially in bad weather Shorter service life means more frequent replacement Weather & Climate Performance Extreme Temperatures: Modified bitumen (especially SBS) stays flexible in freezing temps and resists cracking. Roll roofing tends to become brittle in cold weather and can crack under thermal expansion. Waterproofing: Modified bitumen excels with welded seams and multi-layer waterproofing. Roll roofing provides basic protection but is more vulnerable to leaks. UV Protection: Modified bitumen with APP polymers and reflective coatings handles sun exposure well. Roll roofing degrades faster in direct sunlight. If you live somewhere hot, cold, wet, or windy (so, almost everywhere), modified bitumen is going to give you more peace of mind. Roof Slope, Structure Size & Compatibility Roof Slope: Modified bitumen works great for low-slope and even some steep-slope roofs. Roll roofing should only be used on very low slopes – ideally under 3:12. Building Size: Modified bitumen is suited for large or small buildings and can cover wide flat roofs efficiently. Roll roofing is better for small surfaces – like garden sheds, carports, or lean-tos. Trying to use roll roofing on a large home or commercial roof is like putting bicycle tires on a pickup truck. It might hold up briefly, but it’s not built for it. Energy Efficiency & Environmental Considerations Modified Bitumen: Roll Roofing: When to Choose Which Roofing Type Go with Modified Bitumen if you: Go with Roll Roofing if you: Common Mistakes to Avoid Need Help Choosing The Right Roof Type? Get expert advice based on your roof and budget. Book Your Free Appointment Frequently Asked Questions Can modified bitumen or roll roofing be installed over an existing roof? Modified bitumen can sometimes be installed over one existing layer if the surface is sound and local codes allow it. Roll roofing is generally used for new or temporary roofs – overlaying it isn’t recommended due to seam and adhesion issues. Are there different colors or finishes available for either roofing type? Modified bitumen comes in a range of surface finishes, including reflective coatings and mineral granules in different colors. Roll roofing also comes in limited colors, but most are standard grey or black with fewer aesthetic options. Does either roofing type qualify for tax credits or energy rebates? Some APP-modified bitumen systems with cool roof ratings may qualify for local energy efficiency rebates. Roll roofing usually doesn’t qualify due to lower reflectivity and shorter lifespan. How noisy are these roofs during rain or hail? Both roofing types are quieter than metal roofing, but modified bitumen tends to dampen sound better thanks to its layered
How to Get Insurance to Pay for Roof Replacement?

Roof damage is stressful enough without having to figure out if your insurance will help pay for it. Between confusing policy terms, tight deadlines, and vague estimates, it’s easy to feel stuck before you’ve even started. But getting your claim approved isn’t impossible. It just takes a bit of know-how. We’ll walk through what to do, when to do it, and how to improve your chances of getting covered. Key Notes Policy coverage varies: know ACV vs RCV and age restrictions before filing. Licensed roofer inspections before insurance adjusters improve claim success rates. Meeting adjusters with your contractor ensures a complete damage assessment. Denied claims can often be appealed with additional evidence or reinspection. 1. Know What Your Policy Covers (& Doesn’t) Before you file a claim, grab your insurance policy and start reading. Not every type of damage is covered, and not every roof qualifies for full replacement. If you’re unsure about the terms, call your agent for clarification. It’s better to ask than assume. 2. Call a Licensed Roofer Before You Call the Insurer This one surprises people, but it makes a big difference. A licensed roofing contractor can inspect the damage, take photos, and provide a detailed report – before the insurance adjuster shows up. Why it matters: Plus, many contractors (including us) are experienced in insurance claims and can guide you through the process. 3. Document Everything Insurers want proof. The more thorough, the better. Here’s what to include: Bonus tip: Use timestamps on your files or keep a simple log noting when each was taken. 4. File the Claim Promptly Insurance companies usually require you to file claims within a specific window. Sometimes it’s 30 days, sometimes up to a year. But sooner is always better. Delaying your claim could give the insurer a reason to deny it. And if secondary damage occurs because you waited? That’s often not covered. 5. Meet the Insurance Adjuster (With Your Roofer in Tow) Once your claim is filed, your insurer will send out an adjuster to inspect the damage. Make sure your contractor is there too. Why it helps: The adjuster will prepare an estimate based on what they see, so it’s important they get the full picture. 6. Review the Insurance Estimate Carefully When the insurance company sends back their estimate: If the payout looks too low, you can request a reinspection or submit additional documentation. Many first estimates are negotiable. 7. Understand When Full Replacement is Justified Insurers won’t always approve a full replacement, but there are scenarios where it’s warranted: Your roofer can help you argue for a full replacement if it’s justified by one of these factors. 8. Complete the Work and Submit Final Documents Once your claim is approved: What If Your Claim Gets Denied? Don’t panic – denials can often be appealed. Steps you can take: Avoid These Common Mistakes Get Insurance To Work In Your Favor Avoid delays, denials, and out-of-pocket surprises. Get Free Quote Now Frequently Asked Questions Will my homeowner’s insurance cover a roof replacement if I live in a high-risk storm area? It depends on your specific policy. Some insurers offer special wind or hail deductibles or exclude coverage entirely in high-risk zones. Always check for policy riders or limitations based on location. Can I upgrade my roofing material during the replacement process? Yes, but your insurer will typically only cover the cost of replacing with similar materials. Any upgrades (like switching from asphalt to metal) would be an out-of-pocket expense. Does filing a roof claim always raise my premiums? Not necessarily. Insurers often raise premiums based on broader regional risk, not individual claims. However, multiple claims in a short time may trigger increases or non-renewal. Can I file a claim for partial damage to my roof, or does it have to be a full loss? You can file for partial damage. If the damage impacts your roof’s performance or violates local building codes, it may still qualify for a full replacement depending on your policy. Conclusion Insurance can cover your roof replacement, but only if you approach the process the right way. That means understanding what your policy includes, documenting every detail of the damage, and looping in a roofer who knows how to speak the insurance company’s language. Timing matters. So does proof. And so does having someone on your side who’s done this before. From the first phone call to the last nailed-down shingle, we’ll help you take the guesswork out of it. Book a free appointment if you need a thorough roof inspection, help building a strong claim, or just want to know what your options really are.
What To Do About Roofs With Storm Damage?

Storms can leave a mark, but not all damage is easy to spot or simple to deal with. If you’re trying to figure out what comes next or whether something needs attention, you’re in the right place. We’ll walk through what to do after roof storm damage, including how to check safely, when to bring in a pro, and how to handle the insurance side without added stress. Key Notes Safety assessment from ground level prevents injuries on potentially unstable storm-damaged roofs. Early documentation with photos and damage records is essential for insurance claims. Professional contractor inspections reveal hidden damage beyond obvious visual signs. Temporary fixes like tarping prevent secondary damage while awaiting permanent repairs. Step 1: Prioritize Safety First Before doing anything, make sure you and your family are safe. Stay off the roof right after a storm – wet shingles and unknown damage can make it dangerous. Keep an eye out for hazards like downed power lines, broken glass, or debris that may have landed on your property. If you notice structural issues like sagging, it’s best to keep your distance and wait for a professional to assess it. Quick Tips: Step 2: Do a Preliminary Check From the Ground Once it’s safe, walk around your home and do a visual check. You don’t need to be a roofing expert to spot some of the most common signs of storm damage. Look for: Inside your home, check for: Document everything. Take photos from multiple angles, jot down what you see, and keep a record of when the storm occurred. This info will come in handy when dealing with your insurance company. Step 3: Decide Repair or Replace? Not every storm-damaged roof needs a full replacement, but sometimes it’s the better option. Here’s how to know the difference. Repair may be enough if: Replacement makes more sense if: Thinking long term? If you live in a storm-prone area, consider upgrading to more durable materials. Options like metal roofing or impact-resistant shingles can provide stronger protection and peace of mind. Step 4: Call a Local, Trusted Roofing Contractor This is where professional help makes all the difference. A reputable roofing contractor doesn’t just fix the damage; they find what you might miss, help with documentation, and guide you through your options. Why local matters: Step 5: Navigate the Insurance Claim If you’re covered, your homeowner’s insurance can help offset repair or replacement costs, but the process can be confusing. Here’s how to stay in control: Before calling your insurer: Next steps: If the payout seems too low or misses key damage, you can submit a supplemental claim. This is where having a solid roofer in your corner really pays off. Step 6: Protect Your Home While You Wait Waiting for repairs or insurance approval? There are a few simple ways to prevent more damage in the meantime: Temporary fixes you can do: But skip the DIY if: Quick, temporary action can buy time, but leave the permanent fixes to the pros. Step 7: Take Steps to Storm-Proof Your Roof for the Future Once the dust settles, it’s worth thinking ahead. Storms aren’t going away, but there’s a lot you can do to protect your roof going forward. Smart preventative upgrades: Seasonal maintenance checklist: Storm Damage? Get Trusted Help Fast Restore your roof before issues spread. Get Free Quote Now Frequently Asked Questions How long do I have to file an insurance claim for roof storm damage? It depends on your policy, but most insurers require you to file a claim within 30–60 days after the storm. That’s why early documentation and inspection are so important. Can I choose my own roofing contractor, or do I have to use one approved by my insurer? You have the right to choose your own contractor. Just make sure they’re licensed, insured, and experienced with insurance claims – it can make the process smoother. What if my roof was already old or worn before the storm? If your roof was nearing the end of its lifespan, your insurance may reduce your payout or deny certain repairs. An inspection report can help clarify what’s storm-related vs. pre-existing. Will filing a storm damage claim increase my home insurance premium? Storm-related claims typically don’t raise your premium the same way non-weather claims might, but it can depend on your insurer and claim history. Conclusion Storms can leave your roof in rough shape, but acting quickly can make all the difference. Whether it’s missing shingles, hidden leaks, or debris damage, the smartest move is to assess early, document everything, and get a professional involved before things snowball. Don’t just look at what’s obvious: roof storm damage can run deeper than it seems. From safety checks to insurance paperwork and reliable repairs, every step counts in protecting your home and avoiding bigger repair bills later. If you’ve spotted signs of storm damage or just want a second opinion, book a free appointment today. We’ll inspect your roof, help with the insurance side, and guide you through the next steps without pressure.
What To Do About Hurricane Roof Damage?

After a hurricane, the first thing you want is peace of mind. But if your roof took a hit, that peace gets harder to come by. Whether it’s a few missing shingles or water stains creeping down your walls, hurricane roof damage needs swift, smart action. We’ll walk you through exactly what to do next. Key Notes Safety first: assess damage from ground level, never climb potentially unstable roofs. Immediate tarping and temporary fixes prevent secondary damage and qualify for reimbursement. Thorough documentation with photos and receipts is crucial for successful insurance claims. Professional contractor inspections reveal hidden damage that adjusters might miss. Step 1: Stay Safe and Assess from the Ground Before you do anything, check your surroundings. If there are downed power lines, flooding, or trees leaning against your home, stay inside. Your safety comes first. Once it’s safe, do a basic visual check from the ground. Here’s what to look for: Don’t climb the roof yourself. It might be unstable. Use binoculars or a drone, or better yet, call in a professional for a proper inspection. Step 2: Prevent Further Damage with Temporary Fixes If you notice obvious leaks, now’s the time to act fast with temporary solutions. Use: Keep receipts and take photos of everything. These temporary fixes can be reimbursable through insurance, and more importantly, they stop things from getting worse. Step 3: Document Everything (Like, Everything) Detailed documentation is your best friend in the insurance process. Here’s what to collect: Don’t throw out damaged items until your insurance adjuster sees them. They’re evidence, even if they’re soggy. Step 4: Understand What Your Insurance Covers Not all damage is treated equally by your policy. Here’s what you need to know: Grab your policy documents or speak with your agent to understand exactly what you’re working with before you file. Step 5: File Your Insurance Claim ASAP Time matters. Most policies require prompt notice after a storm, and delaying could cost you. Here’s how to move quickly: Be present during the adjuster’s inspection if possible, and walk them through everything you’ve found. Step 6: Don’t Rush Repairs – Choose the Right Contractor This step makes or breaks your outcome. Once your claim is moving, it’s time to bring in the pros. A licensed, local roofing contractor will: Step 7: Repair vs Replace: Know What’s Best Not all hurricane damage calls for a full roof replacement. Bbut sometimes, it’s the smarter move. Here’s how to decide: Scenario Repair Replacement Damage is minor and localized ✔️ ❌ Roof is near end of life (20+ yrs) ❌ ✔️ Multiple areas are leaking ❌ ✔️ Less than 25% of roof affected ✔️ ❌ Sagging or structural compromise ❌ ✔️ Multiple past repairs ❌ ✔️ If you’re unsure, your roofer can help you weigh cost, timeline, and long-term durability. Step 8: Upgrade While You’re At It If you’re already replacing your roof, consider upgrading to more hurricane-resistant materials: Watch for These Common Mistakes Even smart homeowners slip up during this process. Avoid these to protect your claim and your home: Worried About Hurricane Roof Damage? Book an expert inspection before things get worse. Get Free Quote Now Frequently Asked Questions How soon after a hurricane can roofing repairs legally begin? In most areas, repairs can begin once emergency conditions have passed and local authorities give the all-clear. Some cities may require permits first – check with your local building department or contractor. Can hurricane roof damage affect my home’s resale value? Yes. If the damage isn’t fully repaired, or if repairs weren’t done professionally, it can lower your home’s value or raise red flags during inspections. A documented, high-quality repair or replacement can help preserve or even boost value. Will my homeowner’s insurance premiums go up after a hurricane claim? Possibly. While hurricane-related claims are common in storm-prone areas, insurers may adjust rates based on risk factors. Still, it’s usually better to file a legitimate claim than cover major repairs out of pocket. Can I stay in my home while hurricane roof repairs are being done? Often yes, but it depends on the extent of the damage. If there are major leaks, exposed decking, or structural issues, your contractor might recommend temporary relocation for safety and comfort. Conclusion Hurricane roof damage can spiral quickly – from a few missing shingles to serious leaks or structural issues if left unchecked. The key is knowing what to do and when: start with safety, assess damage from the ground, document everything, and reach out to your insurance company as soon as possible. Then, work with a trusted roofing contractor who can guide you through the inspection, claims process, and repairs, without making things more stressful than they already are. Whether your roof needs a minor fix or full replacement, acting fast can save you money, hassle, and future damage. Book a free appointment to get a professional roof inspection, expert repair recommendations, or support navigating your insurance claim. Whatever step you’re on, we’re here to help.
7 Most Energy Efficient Roofing | Types, Materials & Colors

Not all roofs are the same when it comes to energy savings. Some trap heat, others deflect it, and the difference can show up fast in your utility bill. If you’re trying to figure out which roofing options help cut cooling costs – or how things like material, color, or insulation factor in – we’ll break it all down so you can make the smartest call for your home. Key Notes Metal roofing leads efficiency with 40% cooling cost reduction through solar reflection. Cool roofs stay 50°F cooler than standard materials, cutting cooling costs 10-30%. Tile roofing provides natural thermal regulation through high thermal mass properties. Light-colored roofs reflect 90% more sunlight than dark options for maximum efficiency. 1. Metal Roofing Metal roofing consistently ranks as one of the most energy-efficient options available. Its naturally reflective surface bounces solar radiation away from your home, which significantly reduces heat absorption – a major benefit in hot, sunny climates. Many systems also include reflective coatings that further improve solar reflectance and emissivity. Energy Efficiency Benefits: Why It Works: The combination of high solar reflectance, low thermal mass, and the ability to install ventilation below the panels makes metal roofing a top-tier choice for energy-conscious homeowners. 2. Cool Roofs Cool roofs are designed specifically to reflect more sunlight and absorb less heat than standard roofing materials. They come in various forms (metal, tile, shingles, or coatings) but all share a focus on solar reflectance and thermal emittance. On hot days, a cool roof can stay up to 50°F cooler than conventional options. Energy Efficiency Benefits: Why It Works: Cool roofs reflect UV rays and release absorbed heat, reducing the urban heat island effect and lowering your overall energy load, especially in southern climates. 3. Tile Roofing (Clay, Concrete, Slate) Tile roofing provides a unique combination of durability, reflectivity, and natural thermal regulation. Clay and concrete tiles have high thermal mass, meaning they absorb and slowly release heat, helping stabilize indoor temperatures. Add reflective coatings, and tile becomes an excellent energy-efficient solution. Energy Efficiency Benefits: Why It Works: The curved shape of many tiles allows airflow between the roof and decking, which naturally ventilates and reduces heat transfer. When paired with proper underlayment, tile roofing excels in both performance and longevity. 4. Asphalt Shingles with Cool Coatings Traditional asphalt shingles aren’t known for efficiency, but newer versions with cool roof technology have changed the game. These shingles incorporate reflective granules that bounce back sunlight and reduce heat absorption. While not as high-performing as metal or tile, they’re a budget-friendly way to increase energy savings. Energy Efficiency Benefits: Why It Works: While not the most efficient option overall, cool roof asphalt shingles make energy savings more accessible for homeowners needing an affordable re-roofing solution. 5. Synthetic Roofing Made from materials like polyurethane or recycled plastics, synthetic roofing options combine insulation and durability in one lightweight package. Many are designed to mimic slate or shake roofing while offering better energy performance and lower weight. Energy Efficiency Benefits: Why It Works: Synthetic materials often incorporate insulating layers and reflective finishes, helping regulate indoor temperatures and reduce both heating and cooling loads. 6. Green Roofs (Vegetative Roofs) Green roofs use a layer of soil and vegetation to naturally insulate and regulate building temperatures. While more common in commercial buildings, they’re gaining traction in residential construction for their sustainability benefits. Energy Efficiency Benefits: Why It Works: The combination of shading, evapotranspiration, and thermal mass keeps buildings cooler in summer and more stable in winter, making green roofs a long-term energy-saving solution. 7. Solar Roof Shingles Solar roofing shingles generate electricity while serving as your home’s protective covering. Although the upfront cost is higher, they provide long-term energy savings by reducing your reliance on the grid. Energy Efficiency Benefits: Why It Works: By combining energy generation with roof coverage, solar shingles deliver dual value – lower utility bills and high-tech aesthetics – especially when paired with battery storage. Bonus: Roof Color Matters Roof color has a bigger impact on energy efficiency than most people realize. Light-colored roofs reflect more solar radiation, reducing surface temperature by up to 50°F compared to darker options. Pro Tip: Pair light-colored roofing with reflective coatings for maximum cooling efficiency, especially in hot climates. Other Key Factors: Underlayment, Shape & Retrofitting Maximize Comfort, Minimize Energy Waste Start saving with smarter, longer-lasting roofing today. Get Free Quote Now Frequently Asked Questions Do energy-efficient roofs help in colder climates too? They can, depending on the design. Roofs with strong insulation and thermal mass (like tile or insulated metal) help retain indoor heat, which reduces heating needs in winter – especially when paired with proper underlayment. How much more does an energy-efficient roof cost upfront? Costs vary, but efficient materials like metal or tile typically cost more initially. That said, they often pay off in the long run through energy savings, fewer repairs, and longer lifespans. Can I make my current roof more energy efficient without replacing it? Yes. Reflective roof coatings, radiant barrier underlayments (if accessible), and improved attic insulation can all boost efficiency without a full replacement. Will a cool roof change the look of my home? Not necessarily. Many energy-efficient options come in a wide range of colors and finishes, so you can find a style that fits your home while still lowering your energy bills. Conclusion Energy-efficient roofing is one of the smartest ways to cut long-term costs, reduce heat buildup, and make your home more comfortable year-round. Whether you’re looking at metal for its unbeatable durability, tile for its thermal mass, or cool-coated shingles for a budget-friendly boost, the best choice comes down to your climate, structure, and goals. Even your roof’s color and underlayment can shift your energy savings more than you’d think. Not sure where to start? Book a free appointment to compare materials, talk through energy-saving upgrades, or get a quote for a roof that works harder for your home (and your wallet!).
Best Roofs For Hurricanes & High Winds | Design & Materials

Not all roofs are built for hurricane season, and finding one that can truly hold up when the winds pick up isn’t always straightforward. Between flying debris, driving rain, and powerful gusts, your roof needs more than just curb appeal. We’ll break down the best roofs for hurricanes, looking at the top materials, smart designs, and what actually keeps a roof in place when storms hit hard. Key Notes Metal roofing leads hurricane resistance with 160+ mph wind ratings and Class 4 impact protection. Hip roofs with 30-degree pitch deflect wind most effectively compared to gable designs. Proper fastening with hurricane straps and screws prevents most storm failures. Impact-resistant materials prevent debris damage that causes secondary water intrusion. What Makes a Roof Hurricane-Resistant? It’s not one single factor but the combination of materials, design, structural reinforcements, and proper installation. Hurricane-resistant roofs are built to: Best Roofing Materials for Hurricanes & High Winds Metal Roofing: The Gold Standard Metal roofs are widely considered the best material for hurricane-prone regions, and for good reason: Standing seam metal roofs, in particular, offer excellent structural performance because the panels interlock and are fastened securely to the roof deck. Just remember: proper installation is key. Without the right fasteners and reinforced ridge caps, even a great metal roof can fail. Composite Roofing: The Rising Contender Synthetic or composite tiles are engineered to deliver the best of all worlds: They’re newer to the scene and can be pricier, but the long-term performance is impressive. Clay and Concrete Tile Roofing Tile roofing has its pros and cons in a storm: However, they’re heavy. That means the structure may need reinforcement. And if individual tiles break loose, they can become dangerous projectiles. Impact-Resistant Asphalt Shingles While standard shingles don’t cut it in a hurricane zone, high-quality, laminated asphalt shingles offer: Installed correctly – with reinforced starter strips, appropriate nail patterns, and hurricane straps – they’re a solid option for homeowners on a budget. Slate Roofing Slate performs well, but it’s not for everyone: Much like tile, the weight adds stability but demands strong structural support. And if a piece comes loose, it can do serious damage. Roof Design: Shape & Pitch Matter Your roof’s shape and slope can either fight wind or catch it like a sail. Best Roof Shapes for Wind Resistance Best Roof Pitch for Wind Resistance Fastening, Underlayment & Installation Even the best material or design can fail if the roof isn’t secured properly. Key Components: Always work with a roofing pro who follows local codes and manufacturer specs – and skip the DIY attempts when it comes to hurricane protection. Structural Weak Points: Where Roofs Fail in Storms Understanding common failure points can help you prevent them. Prevention starts with design and ends with inspection. Invest in strong materials and workmanship upfront to avoid massive repairs later. Why Impact Resistance Matters Flying debris is a major threat during hurricanes. Without impact resistance, your roof becomes a vulnerability: Look for roofs tested to UL 2218 Class 4 or equivalent standards. A roof that can survive debris can survive the storm. Maintenance: Your Roof’s First Line of Defense Even the strongest roof won’t hold up without regular upkeep. Here’s what to stay on top of: A professional inspection before hurricane season can help catch issues early and save you thousands. Is Your Roof Built To Withstand Hurricanes? Avoid costly damage – know where you stand today. Book Free Inspection Today Frequently Asked Questions Do hurricane-resistant roofs cost more? Yes, hurricane-resistant materials like metal, composite, or Class 4 impact-rated shingles typically cost more upfront. But the long-term savings on repairs, insurance premiums, and roof replacements often outweigh the initial investment. Can a roof be retrofitted for better hurricane protection? In many cases, yes. Reinforcements like adding hurricane straps, upgrading underlayment, sealing vulnerable areas, and replacing weak shingles or tiles can significantly improve your roof’s storm resilience without a full replacement. Will my homeowner’s insurance cover roof upgrades for hurricane resistance? Insurance usually doesn’t cover upgrades unless damage has already occurred, but many providers offer discounts for installing impact-resistant materials or hurricane mitigation features. It’s worth asking your insurer directly. How do I know if my roof meets local hurricane building codes? Building codes vary by state and county. A licensed roofing contractor can inspect your current system and verify compliance, or recommend updates to bring it up to code before hurricane season. Conclusion When it comes to hurricanes and high winds, the right roof can make all the difference. Metal roofing continues to lead the pack with its exceptional wind and impact resistance, while composite tiles and clay or concrete options bring solid performance with added aesthetic appeal. Architectural asphalt shingles offer a more budget-friendly path, but proper installation matters just as much as the material itself. Roof shape, pitch, fasteners, and maintenance all play a role in how well your home holds up when the next big storm rolls in. If you’re unsure whether your roof is up to the task or just want expert guidance before hurricane season, book a free appointment with Go Roofing. Whether it’s for an inspection, quick repair, or a full replacement quote, we’re here to help you protect what matters most.
How to Pick a Roof Color?
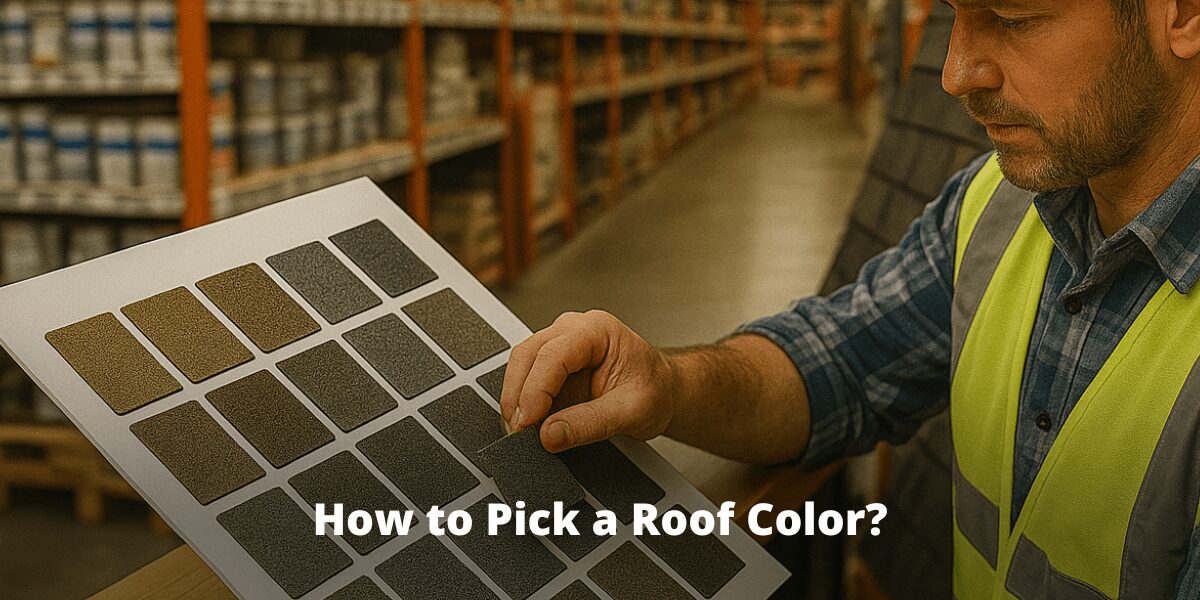
Roof color might not seem like a big deal—until it’s your turn to choose one. Then suddenly, it’s tied to everything from how hot your home gets in summer to whether your house stands out for the right reasons. But there is good news: A few practical rules can take the guesswork out of it. We’ll break down how to pick a roof color that works long-term. Key Notes Match roof color with architectural style and surrounding landscape for cohesive curb appeal. Consider climate factors—darker roofs absorb heat while lighter colors reflect sunlight. Coordinate with existing exterior elements like siding, brick, and neighborhood aesthetics. Test samples in different lighting conditions before making your final decision. What Influences Roof Color Choice? Climate and Regional Considerations The local climate should significantly influence your roof color selection. In hot, sunny climates, lighter roof colors reflect more sunlight, reducing cooling costs by 20-30%. Conversely, darker roof colors are beneficial in colder climates as they absorb heat, aiding snow melt and reducing heating demands. Regional trends also play a role, with specific colors being more prevalent in certain areas, such as terra cotta in the Southwest or classic blacks in New England. Architectural Style and Neighborhood Context Your home’s architectural style is a guiding factor for roof color selection. For instance, a Colonial home might suit a dark gray or black roof, while a Mediterranean style could benefit from terra cotta or warm brown. Additionally, neighborhood cohesion is important; while your roof doesn’t need to match your neighbors’ exactly, it should harmonize with the overall aesthetic of the area. Roof Color and Energy Efficiency Roof color significantly impacts your home’s energy performance. Lighter roofs generally have higher Solar Reflectance Index (SRI) values, reflecting more solar energy and staying cooler, which is advantageous in hot climates. Darker roofs, while potentially increasing cooling demands, can provide heating benefits in colder regions. Technical Insights into Energy Efficiency Two key factors determine a roof’s thermal performance: solar reflectance and thermal emittance. Modern “cool roof” options use specialized pigments to improve the SRI of darker colors, enhancing energy efficiency without sacrificing color preference. Comparing Roofing Materials & Their Color Options Different roofing materials offer varying color palettes and performance characteristics. Roofing Color Options Asphalt shingles provide the widest color range and are typically the most affordable. Metal roofing offers excellent longevity and energy efficiency, with colors ranging from traditional reds to contemporary charcoals. Tile roofing traditionally features terra cotta reds but now includes cool blues and greens. Material-Specific Color Considerations Asphalt shingles: Darker colors may show granule loss more visibly over time. Metal roofing: Premium finishes maintain color integrity for decades. Tile roofing: Clay tiles retain color well, while concrete tiles may require resealing. Practical Tips for Choosing the Right Roof Color Consider your home’s fixed elements – Brick, stone, and other permanent materials should guide your roof color choice. Collect samples – Obtain actual material samples from manufacturers to view in different lighting conditions. Look at complete homes – Drive through neighborhoods to observe similar homes with different roof colors. Test color combinations – Place roofing samples against your home’s siding, trim, and fixed elements to assess compatibility. Consider long-term plans – Choose a versatile roof color if you might change your home’s exterior color in the future. Balance contrast appropriately – Create distinction without overwhelming contrast. Making Your Final Roof Color Decision For maximum resale value: Neutral colors like weathered wood blends typically appeal to the broadest range of buyers. For energy efficiency in hot climates: Lighter colors or “cool roof” products offer the best performance. For architectural authenticity: Choose colors that honor your home’s architectural heritage. For visual impact: Consider how your roof will look from the street, opting for subtle colors on steeper roofs. Choosing A Roof Color? We’ll make sure the build matches the plan GET YOUR FREE QUOTE NOW Frequently Asked Questions How much does roof color affect my home’s energy efficiency? Roof color can impact energy costs by 20-40% in extreme climates. Light-colored roofs can be 50-60°F cooler than dark roofs in summer, potentially reducing cooling costs by 7-15% in hot regions. Are there any HOA or municipal restrictions I should be aware of when choosing roof colors? Many homeowners’ associations and some municipalities have specific guidelines or restrictions regarding roof colors and materials. Check your HOA bylaws or local building codes before making a final decision. How often will I need to replace my roof if I choose a darker color versus a lighter one? Darker roofs typically show less visible dirt and algae but may deteriorate 10-15% faster in sunny climates due to increased heat absorption. Lighter roofs generally last longer in hot regions but may require more frequent cleaning. Can I change my roof color when replacing just a section of damaged roofing? While possible, it’s generally not recommended as even slight color variations between new and existing materials will be noticeable. If you must replace a section, consider whether the visible contrast will be acceptable. How do different roofing materials hold their color over time? Metal roofs typically maintain color for 25-30 years with proper coatings. Asphalt shingles may fade 15-20% within the first 5-7 years. Concrete tiles hold color well but may develop patina. Clay tiles and slate maintain their natural colors longest, often for the life of the roof. Conclusion Choosing a roof color sounds simple—until you’re staring at 20 shades of a color that all look the same under showroom lights. But when you break it down by climate, architectural style, material, and how it ties in with the rest of your home, the decision gets easier—and smarter. Whether you’re going for curb appeal, energy savings, or resale value, the right roof color should work hard without drawing too much attention to itself. If you’re replacing your roof or planning a new build, we’ll help you weigh your options and avoid costly missteps. Get your free quote today and start with expert advice that actually
Winter Roof Damage | Complete Protection Guide (2025)
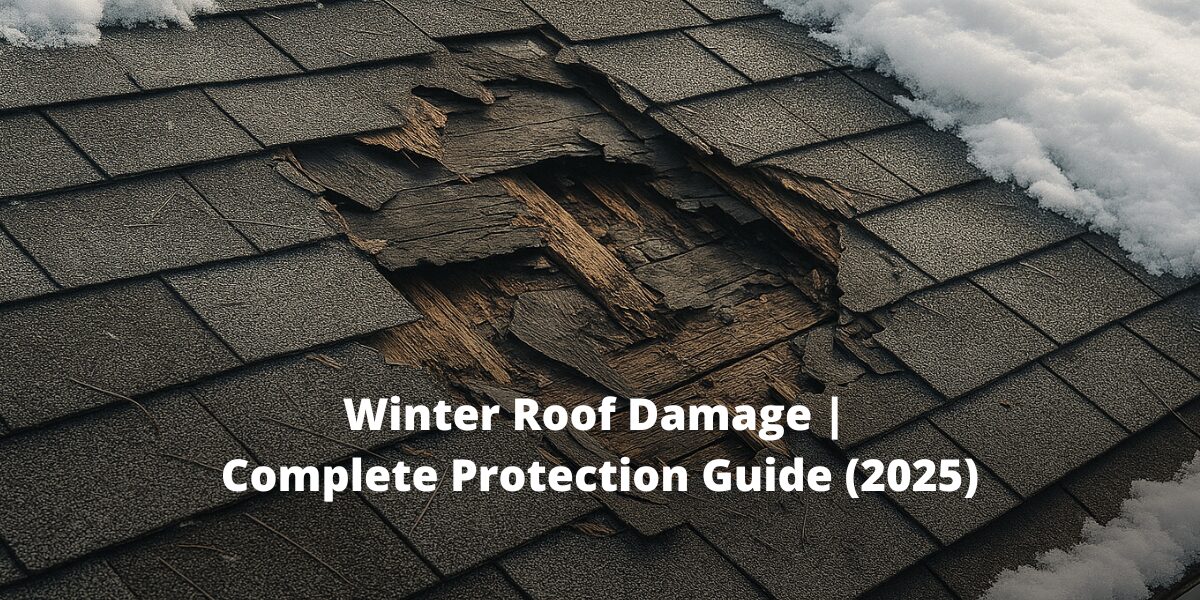
That first snow always looks great—until you start thinking about what it’s doing to your roof. Between freezing temps, ice dams, and a ton of added weight, winter can quietly do real damage up there. And by the time you spot a leak, it’s usually too late. We’ll break down how to prep, protect, and stay ahead of costly winter roof problems before they pile up. Key Notes Identify and prevent ice dams using proper insulation, ventilation, and snow removal techniques. Calculate safe snow load limits for your roof type and region-specific guidelines. Inspect for pre-winter vulnerabilities including damaged flashing, missing shingles, and clogged gutters. Apply preventative maintenance strategies that can save thousands in emergency winter repairs. Winter Roof Damage: Causes and Consequences Winter weather creates unique challenges for roofing systems. The primary culprits behind winter roof damage include: Heavy snow loads that put excessive weight on your roof structure Ice dams that trap water and force it under shingles Freeze-thaw cycles that expand and contract roofing materials High winds that loosen or remove shingles and flashing Recent climate change patterns have intensified these risks, with many regions experiencing more severe winter storms, rapid temperature fluctuations, and unusual precipitation patterns. These changing conditions make proactive roof maintenance more critical than ever. Neglecting winter roof maintenance can lead to serious consequences: Water infiltration causing interior damage Structural weakening Mold and mildew growth Reduced energy efficiency Shortened roof lifespan Expensive emergency repairs Preventive Measures: Preparing Your Roof for Winter Prevention is always less expensive than repair. Before winter arrives, take these steps to prepare your roof: Schedule a professional inspection to identify potential weak points Clean gutters and downspouts to ensure proper drainage Trim overhanging branches that could fall under snow weight Replace damaged shingles before they lead to leaks Check flashing around chimneys and vents for secure seals Inspect your attic for proper insulation and ventilation Attic Insulation and Ventilation: Key to Preventing Ice Dams Proper attic conditions play a crucial role in preventing winter roof damage, particularly ice dams: Insulation Requirements: Most homes require R-38 to R-60 attic insulation in cold climates Ensure even distribution without gaps or compressed areas Pay special attention to areas around light fixtures and attic access points Ventilation Essentials Aim for a balanced system with intake vents at the eaves and exhaust vents near the ridge The standard recommendation is 1 square foot of ventilation for every 150 square feet of attic space Consider adding baffles to prevent insulation from blocking soffit vents A properly insulated and ventilated attic maintains a consistent roof temperature, preventing the freeze-thaw cycles that lead to ice dams. Smart Home Solutions for Proactive Roof Maintenance Technology offers new ways to protect your roof during winter: Temperature sensors placed strategically in your attic can alert you to unusual temperature patterns that might indicate insulation problems Moisture sensors can detect leaks before they cause significant damage Snow load monitors can warn you when accumulation approaches dangerous levels Automated heating systems for roof edges can prevent ice dam formation These smart home solutions provide real-time data and early warnings, allowing you to address potential problems before they escalate into costly repairs. Managing Snow and Ice: Safe Removal Techniques When snow accumulates on your roof, removal might become necessary, but this task comes with significant risks. DIY Snow Removal Considerations Never climb onto a snow-covered roof Use a roof rake with an extended handle while standing safely on the ground Remove snow evenly to avoid creating unbalanced loads Be aware of power lines and falling ice When to Call Professionals: When snow depth exceeds 6 inches If you notice signs of structural stress (creaking sounds, difficult-to-close doors) For multi-story homes where DIY removal isn’t practical If ice dams have already formed Professional snow removal services have the proper equipment and training to safely clear your roof without causing damage to the roofing materials. Sustainable De-Icing Methods Traditional rock salt and chemical de-icers can damage roofing materials and harm the environment. Consider these more sustainable alternatives: Calcium magnesium acetate (CMA) – less corrosive than salt and biodegradable Heat cables installed along roof edges to prevent ice dam formation Sock-style ice melt products placed perpendicular to the roof edge to create channels for meltwater Solar-powered roof edge heating systems that activate automatically in freezing conditions These methods effectively manage ice while minimizing environmental impact and protecting your roofing materials from chemical damage. Post-Winter Assessment: Identifying and Repairing Damage After winter passes, assessing your roof for damage is essential for maintaining its integrity. Conducting a Thorough Roof Inspection Look for these warning signs of winter roof damage: Missing or damaged shingles Granules from asphalt shingles in gutters or downspouts Water stains on interior ceilings or walls Sagging roof deck Damaged flashing around chimneys, vents, or skylights Clogged or damaged gutters Repairing Winter Roof Damage: Cost and Considerations The cost of repairing winter roof damage varies based on several factors: Minor Repairs: Replacing individual shingles: $200-$500 Repairing flashing: $300-$600 Fixing small leaks: $400-$1,000 Major Repairs: Structural repairs from snow load damage: $2,000-$10,000 Extensive water damage remediation: $1,000-$5,000 Ice dam damage repair: $800-$3,000 Insurance and Financial Considerations Most homeowner’s insurance policies cover sudden, accidental damage from winter storms but may exclude damage resulting from neglected maintenance. To maximize your coverage: Document everything with photos and detailed notes Contact your insurance company promptly after discovering damage Work with a roofing contractor experienced in insurance claims Get a detailed damage assessment from a professional Keep all receipts for emergency repairs Understand your policy deductible before filing a claim Economic Impact of Preventative Maintenance Investing in preventative maintenance delivers significant financial benefits: Annual professional inspection and maintenance: $200-$500 Cost of replacing a typical asphalt shingle roof due to premature failure: $8,000-$15,000 Average lifespan extension through proper maintenance: 5-10 years The math is clear: regular maintenance costs a fraction of major repairs or premature replacement. Worried Your Roof Won’t Make It Through Winter? We inspect, prep & repair before problems get expensive